
Conduct a Stock Count
Record total or per-area stock counts at a location, check saved quantities, and review completion before closing.
Who is this article for?
Open one location at a time to record physical counts. For items assigned to Storage Areas, you can enter a single total or count each area separately.
Open the Location
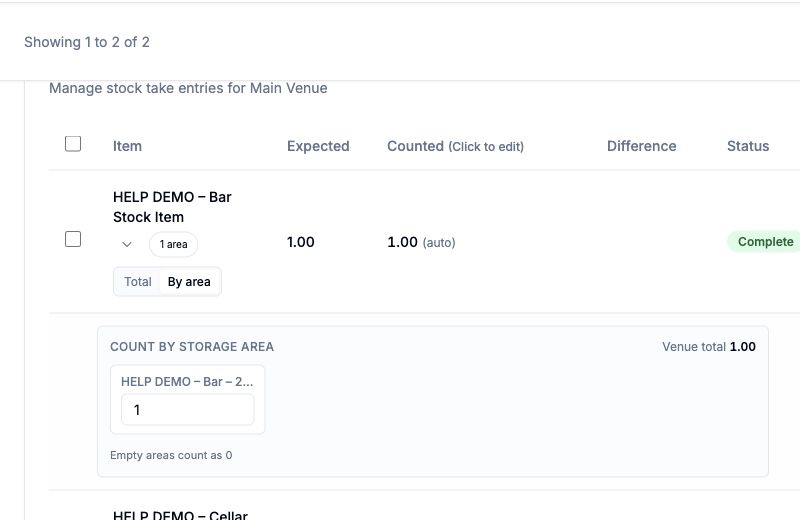
Enter a Total or Count by Area
Items without assigned Storage Areas use one counted total. For an entry with areas:
- Choose Total to enter one quantity for the whole location, or By area to open the assigned areas.
- In By area, enter the quantity found in each area. Crunch adds the area counts into Venue total.
- Check every area before moving on. Empty area fields count as 0.
For example, 4 units in Fridges and 6 in Dry Store give a venue total of 10 units. These are parts of the same location count; they do not create separate live inventory balances.
 View larger
Warning
Saving an area count marks the entry complete. Completion does not prove that every area was checked: an empty area contributes zero. Review the area fields and venue total before closing the period.
If an expected area is missing, check assignments on Stock Take → Storage Areas. Full Crunch also offers assignments on the item’s Stock take Storage Areas card. Configure assignments before starting a new period; existing entries keep the area snapshot from when they were prepared.
Save and Review Progress
Total counts auto-save after a short pause; Enter or leaving the field saves immediately. A valid saved total marks the entry complete. Clearing a total makes it incomplete again. Check the saved indicator and resolve any save error before leaving.
Use the entry edit form for Notes and a Discrepancy Reason. The total-count field rejects negative values and counts above the expected system quantity; check the displayed error if a count cannot be saved.
Finish the Count
Return to the period, review Progress and Discrepancies, then inspect View Analytics. Choose Close Period only after checking all required locations. Closed periods show read-only counting controls.
Set up Storage Areas and start a period Apply repeated updates and add discrepancy reasons Finalise or abandon the count